Getting Started Customer Engagement Strategies with Open Source Tracardi CDP and a Ghost Blog

Have you ever wondered how to engage with your audience effectively and efficiently? That's the timeless goal we're tackling with this getting started guide.
This guide is best read through from the beginning to end by those who've just installed the Tracardi Open Source instance or are just curious.
It's also the document I yearned for when I first ventured into the world of Tracardi, throughout we will be touching upon Ghost theme modifications.
Let's dive in with consents, inbound traffic, profiles, events and automations.
Walkthrough of this article from a recent Tracardi office hours.
How to organise consents
🤝 In the world of Customer Data Platforms (CDPs), building trust is our top priority. Before we dive into all the exciting possibilities of getting started with Tracardi, let's first walk through how to organise consents.
Organising consents is a good place to start because it will allow us to discuss some important Tracardi concepts.
Throughout this post screen grabs are used to introduce you to and give you a sense of where the important concepts discussed are located in Tracardi.
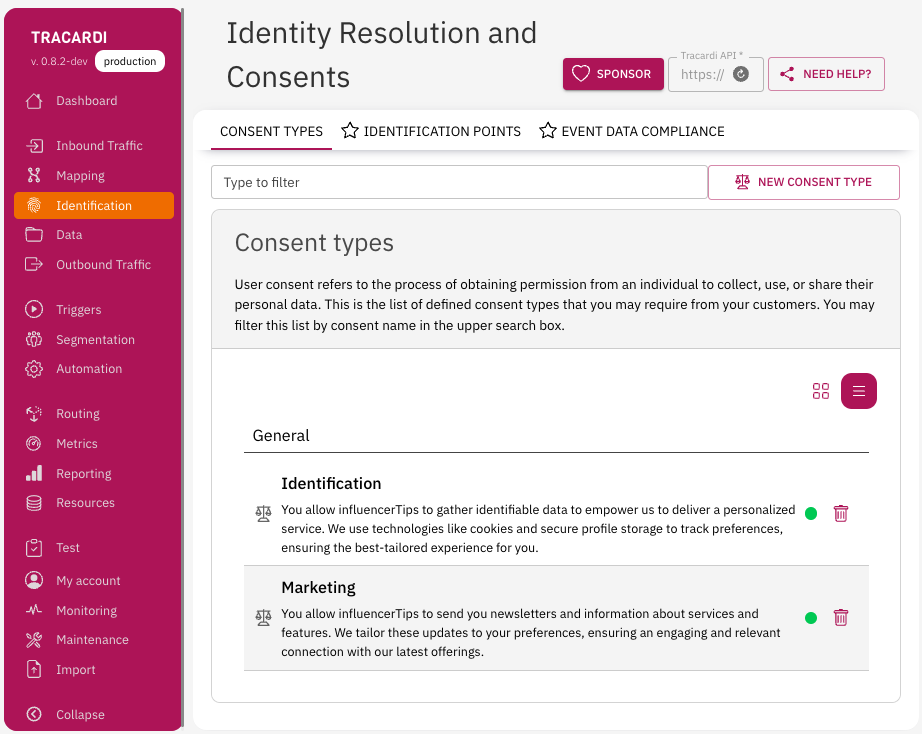
To set up consents, navigate to the identification > contents type page, and then add new consents by clicking on the new consent type button. Each consent will need a title and a description.
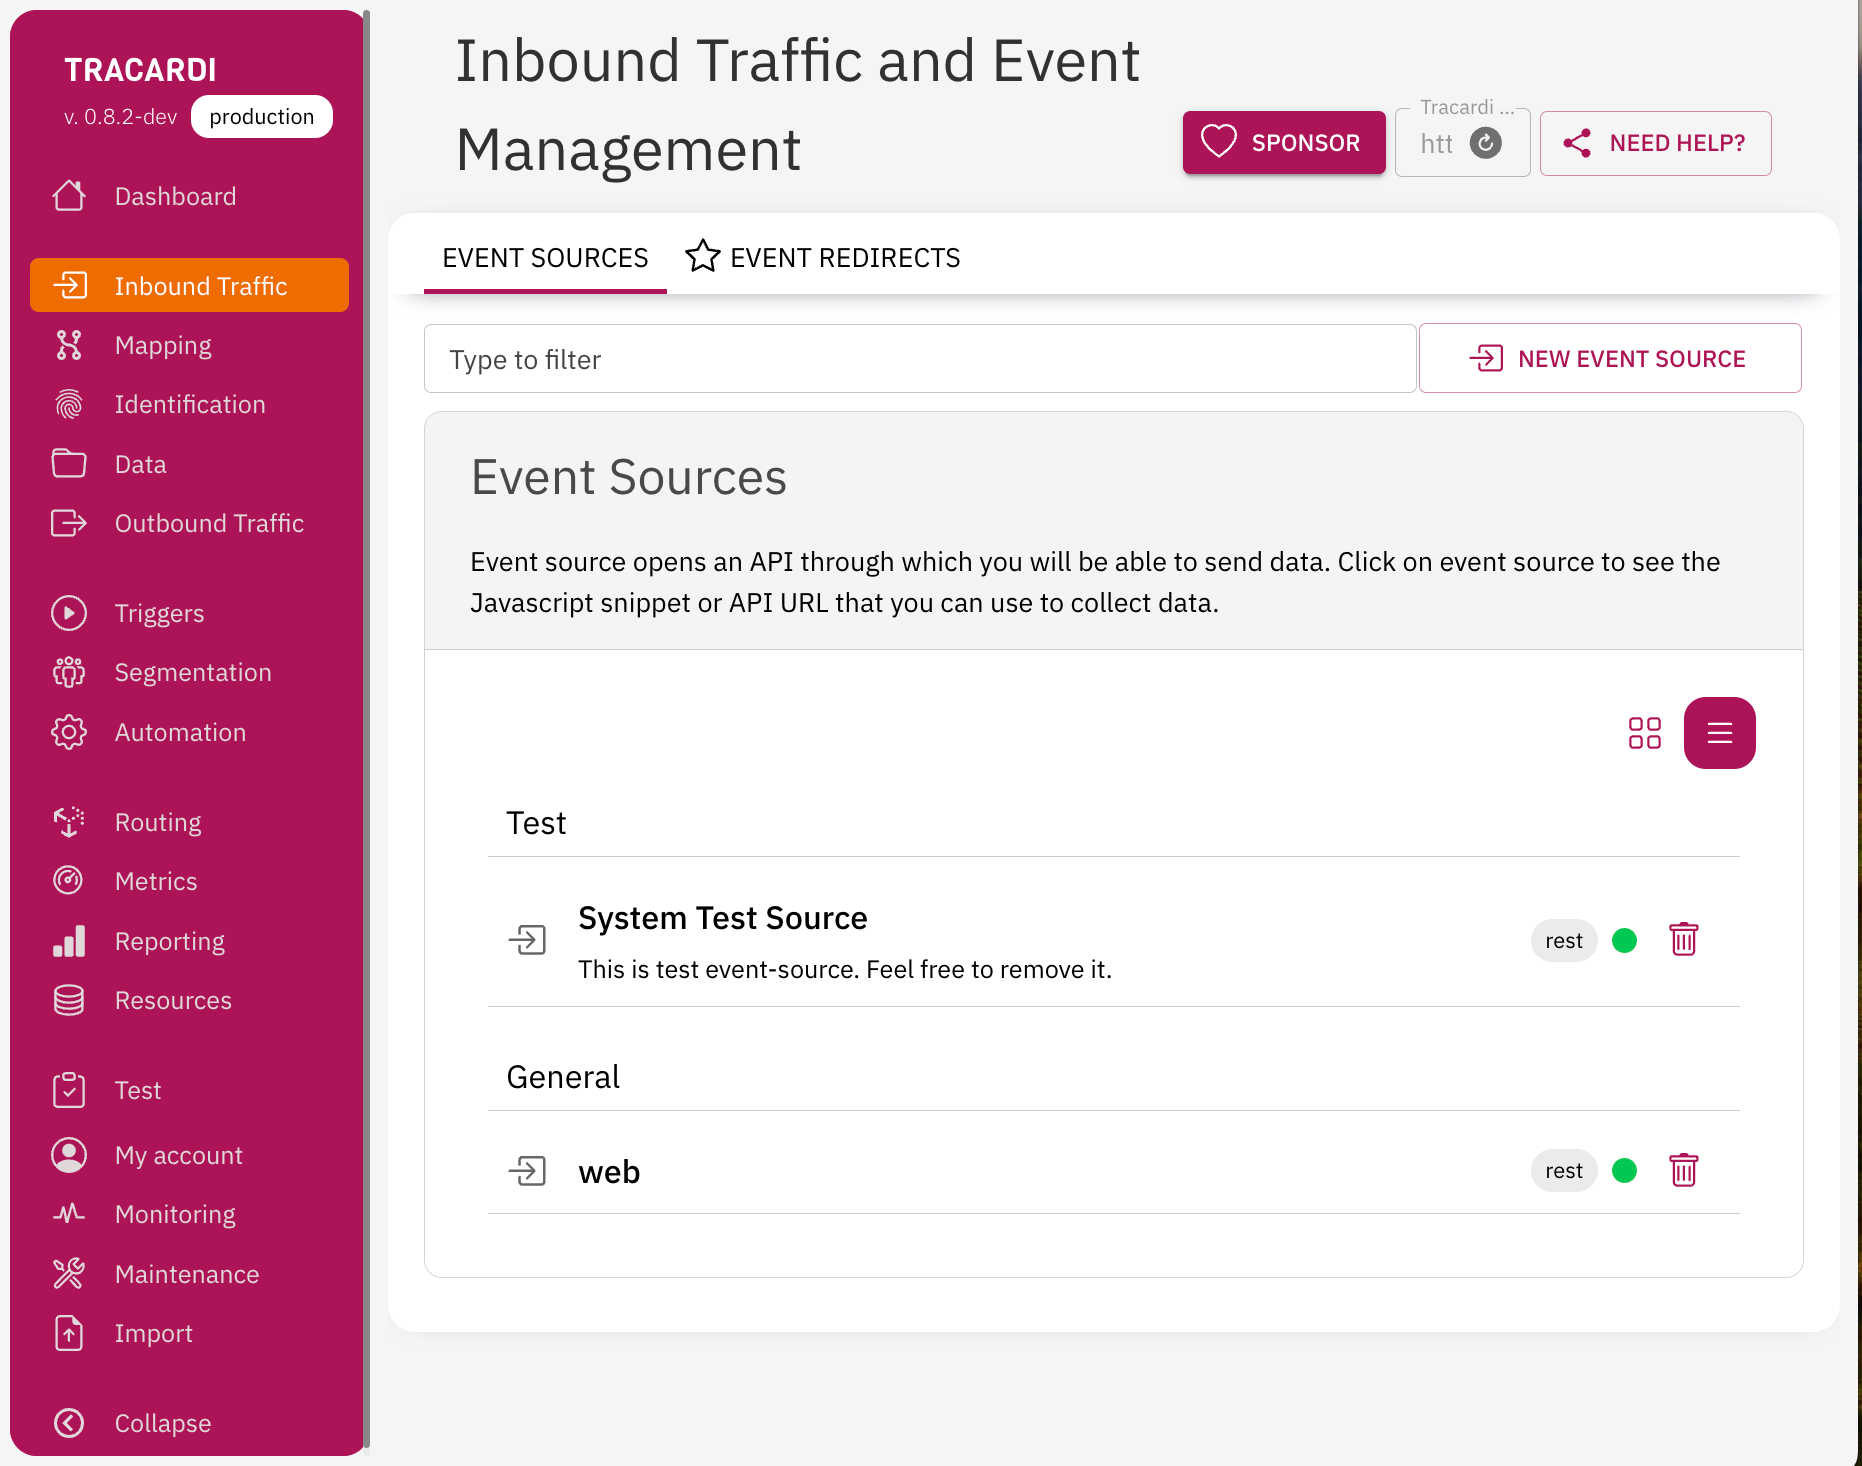
Next, navigate to the inbound traffic > event sources and click on the button new event source. For a website events will be collected from the data bride type: REST API Bridge. When setting up the bridge a name will be required and it will be safe to leave configuration with defaults. Once saved click on the use & javascript option to get a snippet of code that will be required in the HTML head of every page on your website.
The snippet of code is not shown here.
Typically in a Ghost theme this would be in the head section of the default.hbs template.
This minimal setup will integrate your website with Tracardi and cause the page view event to be sent to Tracardi when, as its name suggests, a page is viewed.
Now that we have events following into Tracardi it is time to start handling them.
To view all user defined automations visit the automations page. When setting up a new automation click on the new workflow button and give it a name.
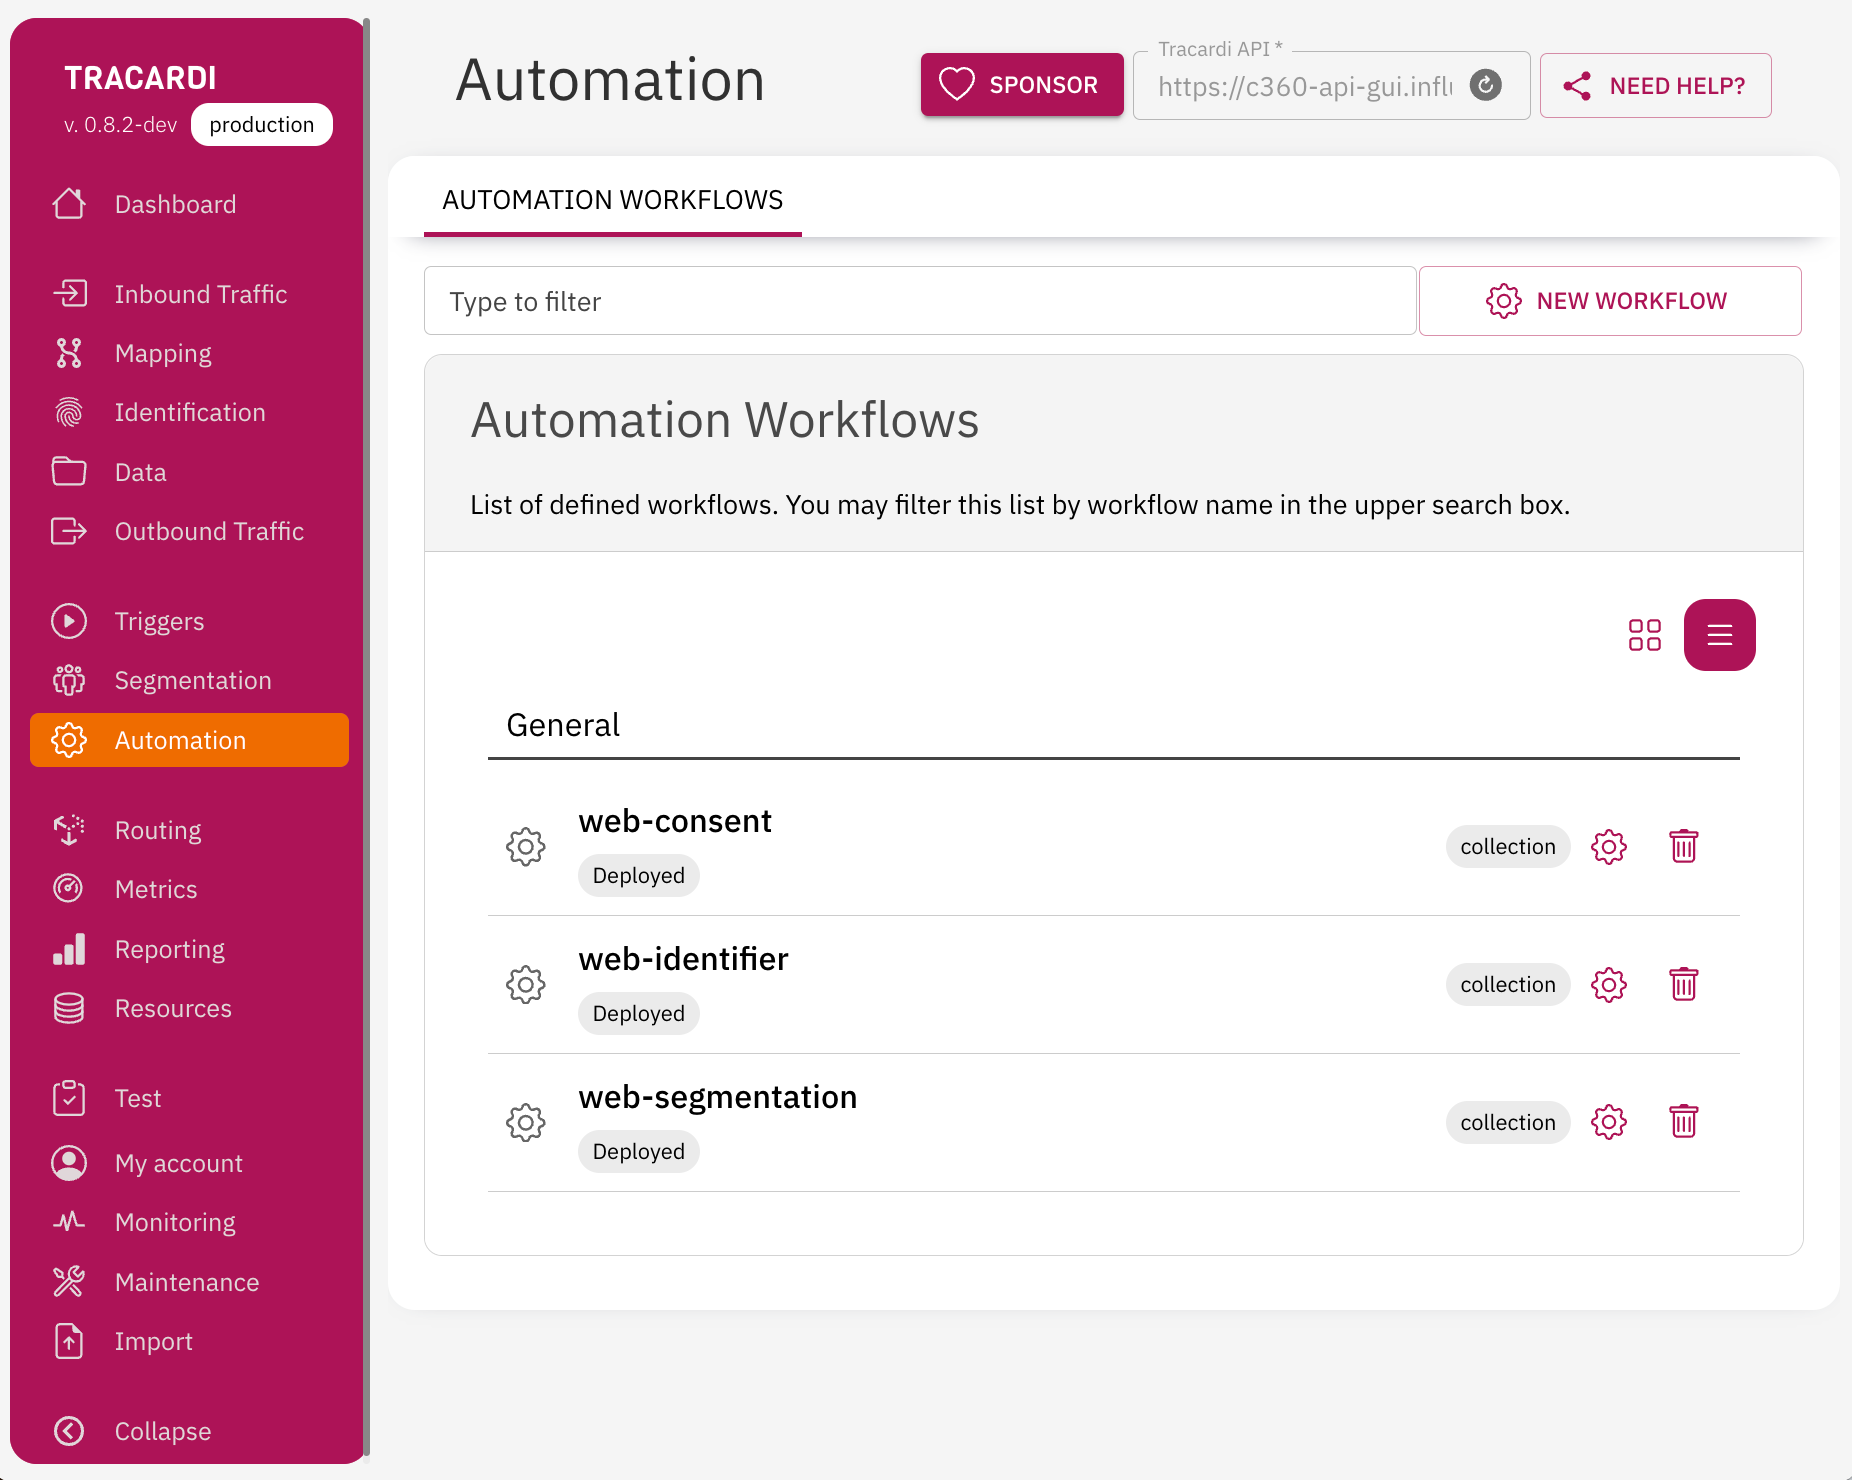
To view the flow of an automation click on clog to edit.
Shown here is the web-consent automation.
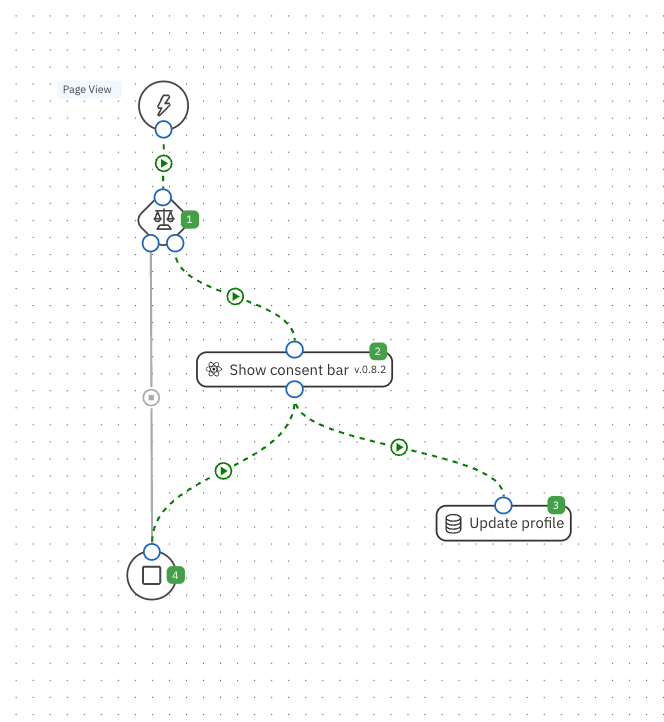
Following is what is happening with the web-consent automation.
Once the follow is triggered by a page-view event then the following activities occurs:
(1) Has consents: This decision activity checks the profile associated with the person visiting to determine if they have the required consents.
{
  "consent_ids": [
    {
      "name": "identification",
      "id": "identification"
    },
    {
      "name": "marketing",
      "id": "marketing"
    }
  ],
  "require_all": true
}
Configuration of the has consents activity.
(2) Show consent bar: This widget activity shows the consent popup on the website. The output branch on the left is true and the one on the right is false.
{
  "endpoint": "replace-with-api-endpoint",
  "uix_source": "replace-with-api-endpoint",
  "position": "bottom",
  "expand_height": 400,
  "enabled": true,
  "always_display": true
}
Configuration of the show consent bar activity.
(3) Update profile: Activity used to update the profile associcated with the person visiting.
(4) End: Signals the end of processing.
There is no configuration for (3) update profile or (4) end activities.
Once all these consent steps are set up we are able to ask the person visiting if they approve of how we plan to use their personal information.
This walkthrough of how to handle consents was a good opportunity to learn how Tracardi works.
In a nutshell, an event triggers an automation and then the automation uses a flow of activities to organise some actions.
How to organise segments
🎯 In a CDP, segments refer to groups of individuals who share common characteristics or behaviours. These characteristics can be derived from various data points and interactions that individuals have. Segmentation is a crucial aspect of a CDP as it allows marketers to categorise their audience into distinct groups, enabling more targeted and personalised communication and marketing strategies.
Shown here is the web-segmentation automation flow.
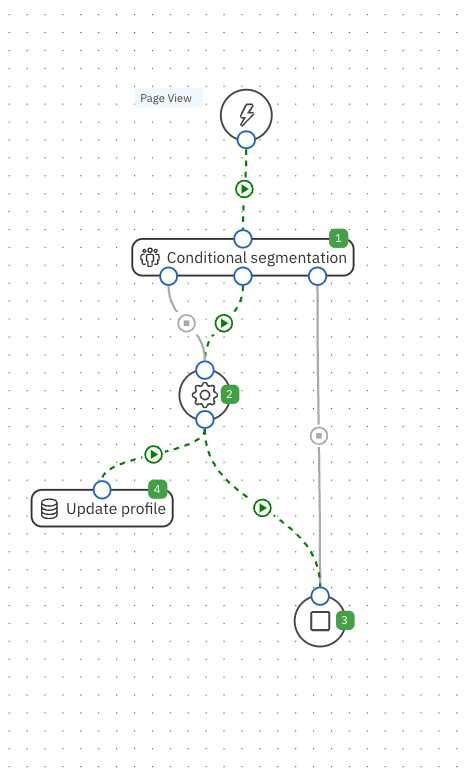
Following is what is happening with the web-segmentation automation.
Once again, this automation flow is triggered by the page-view event.
When the automation is triggered the following activities occur:
(1) Conditional segmentation: Used to apply a segment to the profile of the person visit based on some rules.
{
  "condition": "[email protected] >= 10",
  "true_action": "add",
  "false_action": "remove",
  "true_segment": "web-frequent-visitor",
  "false_segment": "web-frequent-visitor"
}
Configuration of the conditional segmentation activity.
(2) Join: Convenience activity to use for joining the paths of activities in an automation flow.
(3) End: Signals the end of processing.
(4) Update profile: Activity used to update the profile associated with the person visiting. Interestingly the automation editor places this with a number after the end activity. In practice the update is applied.
There is no configuration for (2) join, (3) end or (4) update profile activities.
Once all these segment steps are set up then segmentation will be applied to the profile of the person visiting.
How to organise identification
🔐 Next up we will have a look at how to get Personal Identification Information (PII) from Ghost into Tracardi.
The Ghost platform allows members to login to their account.
Once a member is logged in then the website is able to pass details about the person visiting to Tracardi.
In this case we sending the PII embedded within the webpage.
Shown here is a snippet of script to add to the default.hbs template for passing member data to Tracardi. This snippet should be included in the body of the default.hbs template. What this snippet will do is pass the email, firstname, lastname and Ghost UUID of the logged in member to Tracardi.
{{#if @member}}

    <script>
         window.response.context.profile = true;
         window.tracker.track('identification', {
          "email":{"main":"{{@member.email}}"},
          "firstname": "{{@member.firstname}}",
          "lastname": String("{{@member.name}}").replace("{{@member.firstname}}","").trim()
        });
    </script>

    <script>
        window.tracker.track("subscriber", {
            "ghost" : {
                "uuid":"{{@member.uuid}}"
            }
        })
    </script>

{{/if}}
Snippet of script to add to the default.hbs template for passing member data to Tracardi.
Tracardi has a number of built-in events where no automation is required. The identification event is one of these. When the identification event is triggered the email, firstname and lastname will be updated in the profile for the person visiting accordingly.
For the Ghost UUID an additional automation is required to update the profile accordingly.
Shown here is the web-identification automation flow.
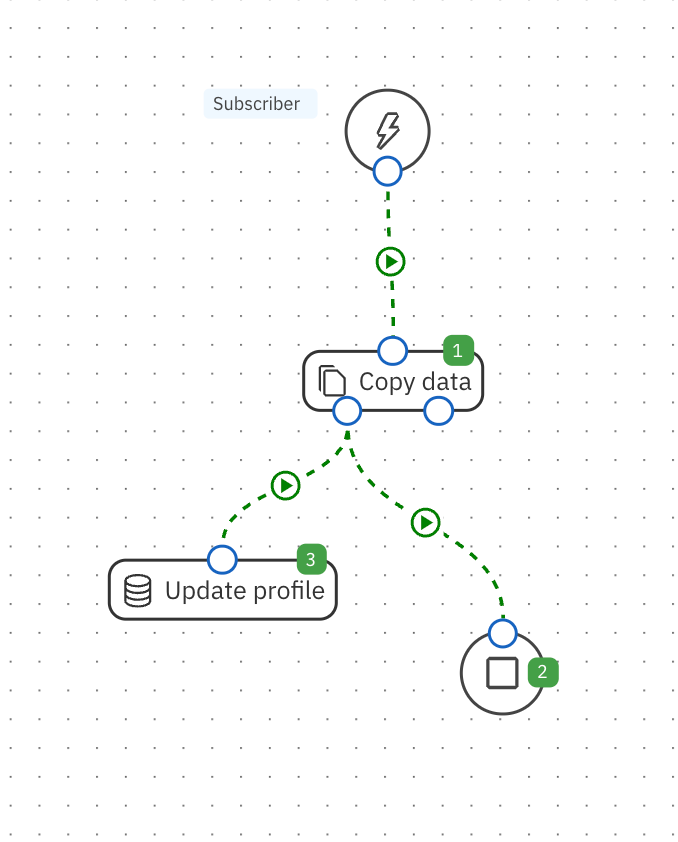
This automation is triggered by the custom event subscription. To create a custom event simply start using it by name.
(1) Copy data: Used to copy data from the event to the profile.
{
  "traits": {
    "set": {
      "[email protected]": "[email protected]"
    }
  }
}
Configuration of the copy data activity.
(2) End: Signals the end of processing.
(3) Update profile: Activity used to update the profile associated with the person visiting.
There is no configuration for (2) end or (3) update profile activities.
How to organise interests
🤖 Finally we are having a look at interests.
Refer to the following for the interest snippet changes for the post.hbs template.
        {{#if tags}}
            {{#foreach tags}}
                <script>
                    (async function() {
                        var tag="{{url}}";
                        tag=tag.split("/")[2];
                        if (tag != 'blog') {
                            await window.tracker.track("increase-interest", {"interest": tag,"value":1});
                        }
                    })();
                </script>
            {{/foreach}}
        {{/if}}
Snippet of script used in the post.hbs template for interest data to Tracardi.
    {{#post}}
        {{> "content" width="wide"}}
        {{#if tags}}
            {{#foreach tags}}
                <script>
                    (async function() {
                        var tag="{{url}}";
                        tag=tag.split("/")[2];
                        if (tag != 'blog') {
                            await window.tracker.track("increase-interest", {"interest": tag,"value":1});
                        }
                    })();
                </script>
            {{/foreach}}
        {{/if}}
    {{/post}}
For context, location of were in the post.hbs the snippet of script used for interest data should be placed.
The identification event is another one of the Tracardi built-in events where no automation flow is required. Therefore no user defined automation flow of activities is required. What will occur when the snippet of interest script is triggered on the post.hbs template is that the interests on the profile will be created and updated accordingly.
That is it for the Getting Started Customer Engagement Strategies with Open Source Tracardi CDP and Ghost Blog Guide.
As mentioned this is what I wished I could have read when I first started with Tracardi.
Note that screen grabs are from Tracardi version 0.8.2 RC4.
Feel very welcome to share thoughts and questions in the comments.
More Tracardi guides will be coming soon.